I built a robot. It’s a little three-wheeled thing. It moves around on its own and (hopefully) avoids obstacles. And beeps and lights up. That’s it. It doesn't make coffee and there’s no risk that it'll rise up against humanity. But it was a great learning experience.
Why I built a robot
Working at the edge of my knowledge
I wanted to do something challenging — something at the edge of my knowledge. I didn't have all the requisite skills or understanding at the outset. For a long time, I was a ‘just in case’ learner. I thought that before starting a project like this, I needed to acquire as much theoretical understanding as I could in case I would need it. But there‘s so much more to learn when you actually start building something.
I still think acquiring some theoretical knowledge — in this case, a basic understanding of electronics — is essential before starting. And all that ‘just in case’ learning helps to quickly know where to look for the answers when I‘m stuck. But for this project, I tried as much as possible to learn ‘just in time’.
Making something physical
As a UX designer, I spend a lot of time working in software. I wanted to build something tangible. Building a robot let me work with my hands. Screws, wires, fragile little components, soldering. There’s something so satisfying about this. There’s something so real about it.
There were more motivations I wrote about before beginning the project.
The Process
Starting
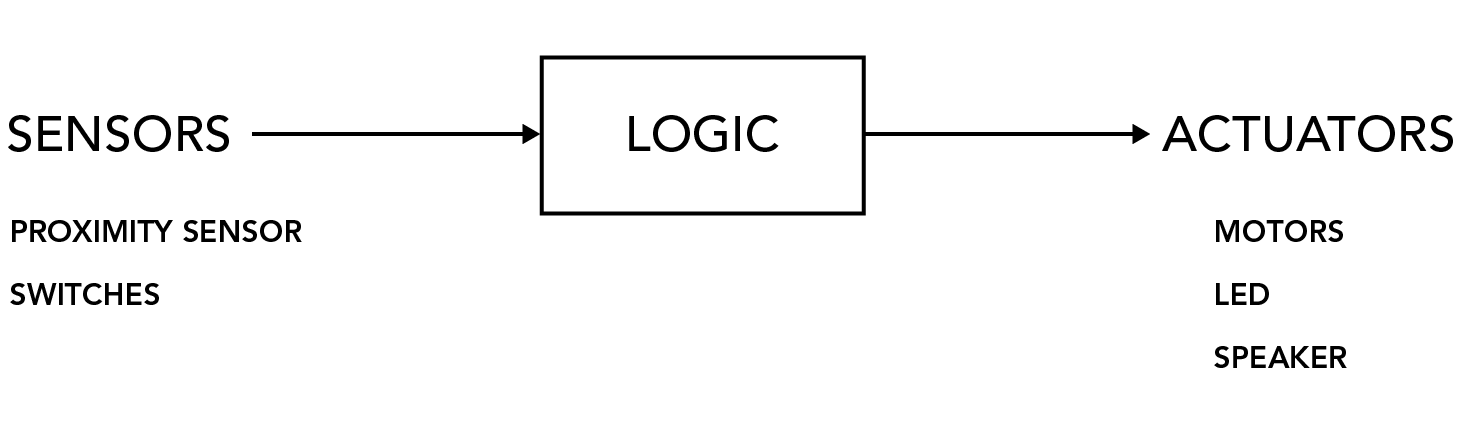
Robots are comprised of sensors and actuators — input and output — with logic in between. This robot will sense objects in front of it and will drive the motors/wheels accordingly. Visual and auditory feedback from an LED and speaker will bring the robot further to life. Switches will toggle between sets of instructions for just how the robot should act.
Brain
The robot is based around an Arduino microcontroller. It is programmable and provides various 'pins' to connect other components. This one is a bit of an older model, but powerful enough and what I had around.

Arduino board: the brains of this thing.
Chassis
Most projects involve build-or-buy decisions. Should I build a component myself or buy an off-the-shelf solution? I thought securely mounting motors to the robot body would be quite daunting, so I opted to use a chassis kit.

The components of the chassis kit: acrylic base, motors, wheels, caster wheel, etc.

Soldering wiring to the motor terminals.
Motors
Two motors were included with the chassis kit. To drive them, I used an Ardumoto motor driver shield. This board mounts on top of the Arduino, matching its pins and translates voltage signals to the higher power required to drive the motors.

The Ardumoto motor driver "shield", mounted on the Arduino board.
Casing
I spent way too much time building the casing out of bass wood. I could have bought a box of some sort and adapted it, but wanted to get more experience working with materials — measuring, cutting, drilling, gluing, etc. I also spent time building a 9v battery holder into the casing, after which I realized that I could buy one for less than $3!

The base and 9v battery holder.

Drilling the speaker grille in the top panel.

Cutting out the 'eye' holes for the ultrasonic distance sensor.

The ultrasonic distance sensor.

The casing takes shape.
Using what I had on hand, artists acrylic paint and gesso as a primer, I painted the robot casing. I had wanted to the robot to resemble vintage computer hardware with that grey-beige appearance, but unfortunately didn't quite achieve that look. For now, I moved on.

The completed and painted casing.

The motor chassis mounted to the bottom of the casing.
Input
Originally intending to use an infrared-based distance sensor, I couldn't get it to work. I couldn't make sense of the values I was getting back. After some struggle, I switched to a highly-regarded ultrasonic distance sensor, which was easy to get working right away. I wish I could have figured out the infrared sensor but was happy to move on and have a working distance sensor.
In addition to a hard power switch, I mounted two 'program' switches to the back of the casing. Using different combinations, one of up to four programs could then be selected.

Power switch and two program switches.
Output
Aside from the motors, the robot has two ways of providing feedback: a speaker and a large red LED. Both were mounted to the removable top of the casing. In order to make the top truly removable, I wanted some way to quickly plug/unplug these elements. After researching possible connectors, I decided to use 3.5mm TS connectors, similar to the (decreasingly) common headphone jack and plug. This choice allowed me to get some experience working with these connectors.

Soldering the speaker, which would be mounted under the speaker grille in the top.

The various components mounted in the casing. Passive components (e.g. resistors) were placed on the protoboard on the left. Kind of a mess of wiring!
Logic
The ultrasonic distance sensor is continuously sending and receiving pulses to see if there's something in the robot's way. If an object is detected within a certain distance, the robot will provide feedback (sound and flashing LED) and then will stop, reverse a little bit, and turn. Additional programs will allow the robot to make other decisions when encountering an obstacle, such turning different directions.

The Robot
The finished robot. It seems to have trouble keeping to a straight line over longer distances, probably because of issues with the wheel mounting. And I have yet to give it more than one program to run. This project was mostly about interconnections between more complex components rather than designing circuits from basic parts: the Arduino microcontroller and motor driver, the ultrasonic distance sensor, the motors, the speaker, the big red LED, and the switches. But it was really exciting to bring it all together and then be able to write code to create interactions between the components.

Front view.

Back view.
Video of the robot in action.